Tuesday, 15 February 2011

Valentine's Day Sugar Cookies

This Valentine's Day, my boy and I decided to exchange handmade gifts instead of buying each other presents. He doesn't have much of a sweet tooth, but he does love sugar cookies. This adapted recipe from Annie's Eats is wonderful and her tutorial on decorating with royal icing is really helpful. I'm not great at decorating with royal icing, but with practice I am getting better!


White Sugar Cookies

Ingredients:

1 c. butter
1 c. powdered sugar
1 egg, beaten
1 tsp almond extract
1 1/2 tsp vanilla
1 vanilla pod
1 tsp salt
2 1/2 c. sifted flour

Directions:

Cream the butter. Add powdered sugar. Cut the vanilla pod in half and scrap out the inside. Add to the beaten egg with the almond extract, and vanilla extract. Add egg mixture to the butter mixture. Blend in the flour and salt.

Chill dough until firm. Roll to 1/4" thickness on a well-floured surface. Cut with cookie cutters and place on greased cookie sheets. Bake at 375*F for 8-10 min. Cookies should not brown.

Allow to cool completely before decorating.

Yields approx 2 dozen cookies depending on the size of the cookie cutter.


Royal Icing

Ingredients:

4 c. powdered sugar, sifted
2 Tbsp meringue powder
5 Tbsp water

Directions:

Combine all ingredients in the cowl of a stand mixer fitted with the paddle attachment. Mix on low speend until the sheen has disappeared and the icing has a matte appearance (7-10min). Transfer the contents of the mixing bowl to an air-tight container. This will be the stiffest consistency of the icing and not intended to be used for decoration.

Add water a little at a time and stir by hand until fully incorporated. Continue until icing has reaches a piping consistency. The icing should not be difficult to pipe. Transfer icing to separate airtight containers and colour icing as desired.

Using a pastry bag, pipe around the edges of each cookie. Let stand until icing is set. Keep remaining icing covered at all times so that it does not begin to harden.

Once all the cookies are edged, thin the remaining icing until it drips off the spoon easily when lifted and smooths in with that still in the bowl within 5-10 seconds. If the icing becomes too thin, add more sifted powdered sugar to thicken it.

Once the icing has reached the desired consistency, transfer to a squeeze bottle and flood the area surrounded by the piping on each cookie. Use a toothpick to help spread it to the edges.

Drop dots of the second icing colour into the just-flooded cookie. Drag a toothpick through the centre of the dots. Allow to set completely.


Monday, 31 January 2011

Cheddar-Ale Soup

As if a cake of chocolate mousses wasn't rich enough for one day....we decided to make Cheddar-Ale Soup for dinner. This soup was y-u-m but super rich and with each spoonful, I could almost feel the cholesterol building in my veins! Still, it was very good-the flavour was rich but mellow. The texture was perfectly creamy. And it's a pretty easy, quick soup to make!


Ingredients:
Serves 6

4 thick-cut bacon slices, cut into 3-inch strips
2 Tbsp unsalted butter
1 large onion, diced
2 carrots, peeled and diced
3 garlic cloves, minced
1/3 cup all-purpose flour
1 cup pale Ale
2 cups milk
2 cups chicken broth
1 1/4 lb. sharp cheddar cheese, shredded

Directions

In a 4 1/2 quart Dutch oven over medium-high heat, cook the bacon until crisp, about 8 min. Transfer to a paper-towel lined plate to drain.

Discard all but 2 Tbsp of the fat in the pot. Reduce the heat to medium and melt the butter. Add the onion and carrots. Cover and cook, stirring occasionally, until the vegetables are softened, about 20min.

Add the garlic and cook for 1 min.

Add the flour and cook, stirring for 3-4min. Add the ale and cook, stirring for 2-3 min.

Add the milk and broth, increase the heat to medium-high and bring to a simmer. Reduce the heat to medium-low and simmer for 10-12 min. Remove the pot from the heaet and puree the soup until smooth.

Set the pot over medium-low heat and add the cheese by the handful, stirring constantly. Do not allow to boil. Ladle the soup into warmed bowls and garnish with the bacon. Serve immediately.


Recipe adapted from Williams-Sonoma

Dark and White Chocolate Mousse Joconde Entremet

The January 2011 Daring Bakers' challenge was hosted by Astheroshe of the blog accro. She chose to challenge everyone to make a Biscuit Joconde Imprime to wrap around the Entremets dessert.


This really was quite a challenge! I spent 2 days making the Entremet and tried really hard to be precise in putting it together. I'm really happy with the end result. I'm usually an impatient and imprecise baker. But, this time I was determined to make a beautiful and tasty dessert.

I decided to fill my Entremet with 2 different mousse recipes. Unfortunately, the dark chocolate mousse turned out to be more like a ganache-very yummy but too dense and rich for this cake. Other than that it was great-the sponge and the white chocolate mousse were amazing!


Joconde Sponge

Yield: Two 1/2 size sheet pans or a 13"x18" jelly roll pan

Ingredients

3/4 cup almond meal
1/2 cup plus 2 Tbsp confectioners' sugar
1/4 cup cake flour
3 large eggs
3 large egg whites
2 1/2 tsp superfine (caster) sugar
2 Tbsp unsalted butter, melted

Directions
1. In a clean mixing bowl, whip the egg whites and caster sugar to firm, glossy peaks. Reserve in a separate bowl to use later.
2. Sift almond flour, confectioners' sugar and cake flour.
3. On medium speed of an electric mixer fitted with a paddle attachment, add the eggs a little at a time. Mix well after each addition. Mix until smooth and light.
4. Fold one third of reserved whipped egg whites into almond mixture. Fold in remaining whipped egg whites. Do not overmix.
5. Fold in melted butter. Reserve batter to use later.


Patterned Joconde-Decor Paste

Yield: Two 1/2 size sheet pans

Ingredients:
14 Tbsp unsalted butter, softened.
1 1/2 cups confectioners' sugar
7 large egg whites
1 3/4 cup cake flour, sifted
Food colouring

Directions:

1. Cream the butter and sugar until light and fluffy.
2. Gradually add egg whites and beat continuously.
3. Fold in sifted flour.
4. Tint batter with colouring to desired colour.

Preparing the Joconde:

1. Preheat oven to 400*F.
2. Using a piping bag with a large tip, pipe decor paste approximately 1/4 inch thick onto a silicone baking mat placed on a baking sheet. Pipe into a decorative pattern.
3. Place baking sheet with paste into the freezer and freeze hard (Approx 20min)
4. Remove from freezer. Quickly pour the Joconde batter over the design. Spread evenly to completely cover the Decor paste.
5. Bake at 400*F until joconde bounces back when slightly pressed, approximately 15min (mine only took about 7-10min so keep a close eye on it.)
6. Cool slightly before removing from the mat.
7. Flip the cooled cake onto a powdered sugared parchment paper. Remove the mat. Cake should be upright with patter showing.

Preparing the mold:

Start with a large piece of parchment paper laid flat on a baking sheet. Place a large piece of clingfilm over this.
Place a springform pan ring with the base removed on top of the clingfilm.
Pull the clingfilm tightly up on the outside of the mold. Line the inside of the ring with a curled piece of parchment paper overlapping the edge. Cut the parchment paper to be flush with the top of the mold.

Trim the cake of any dark, cripsy edges. You should have a rectangle shape like this:


Decide how thick you want your Joconde wrapper. Traditionally, it's half the height of your mold.
Measure the height and cut the cake into equal strips and cut a piece of sponge to fit the base.

Press the cake strips inside the mold, decorative side facing out. Once wrapped inside the mold, overlap the ends slightly. Gently push and press the ends to meet together to make a seamless cake. The mold is now ready to fill.

Chocolate Mousse

(adapted from Patrice Demers' La carte des desserts)\

Ingredients:
2 cups heavy cream
1/2 cup whole milk
1/2 cup heavy cream
4 Tbsp granulated sugar
3 egg yolks
350g dark chocolate, broken into small pieces
2 tsp vanilla extract

1. Beat the 500ml of cream into stiff peaks. Reserve.
2. In a small bowl, whisk the egg yolks together with 1 Tbsp of sugar. In a saucepan, bring the remaining cream, milk, and sugar to a boil. Pour the boiling liquid gradually over the egg yolks, whisking constantly.
3. Return to saucepan and cook, stirring constantly until thick enough to cover the back of a wooden spoon. Pour the mixture through a strainer onto the chocolate and let sit for a mintue. Whisk together until smooth. Add vanilla extract.
4. Fold in 1/3 of the whipped cream. Fold in the remaining whipped cream.
5. Spread the mousse into the cake mold, filling to the top of the cake. Refrigerate until set.
White Chocolate Mousse

Ingredients:
3/4 tsp powdered gelatine.
1 Tbsp water
6 oz white chocolate, finely chopped
1 1/2 cups heavy cream

1. Sprinkle the gelatine over the water in a small bowl and let stand 5 min.
2. Place white chocolate in a medium bowl. Bring 1/2 cup of the cream to a boil in a small saucepan.
3. Remove from the heat, add the gelatine mixture and stir until dissolved. Pour the hot cream mixture over the white chocolate and let stand about 1 min.
4. Whisk until the mixture is smooth. Cool to room temperature, about 5-8min, stirring occasionally.
5. In a clean bowl of a stand mixer, whip the remaining 1 cup of cream at medium speed until it begins to thicken. Increase speed to high and whip until soft peaks form.
6. Whisk in the white chocolate.
7. Spoon white chocolate mousse over the dark chocolate mouse and smooth top with an offset spatula.
8. Refrigerate for 2 1/2 hours.


When set, dust top with cocoa powder, if desired.

Monday, 24 January 2011

Chicken Pot Pie

This is one of my all-time favourite dinners! It is the epitome of comfort food and perfect on a cold winter's evening.


I consider myself something of a chicken pot pie connoisseur and this recipe is the best! It's easy to make, although it is time consuming. I use store-bought puff pastry because I find the idea of making puff pastry from scratch a little intimidating and store-bought tastes really good!

Chicken Pot Pie

Ingredients
3-4 chicken thighs, roasted and shredded
4 chicken drumsticks, roasted and shredded
1 cup petit pois peas
1/4 cup butter
1 chopped red onion
1 chopped garlic clove
1 sliced leek (optional)
1/4 cup plain flour
2 cups chicken broth
2/3 cup milk
unbaked puff pastry

Preheat oven to 220*C.

Boil carrots for 7 minutes, adding the peas for the last 3-4 mins. Drain

In a saucepan over medium heat, cook the onion and garlic in the butter. Add the leeks and cook until soft. Stir in the flour.

Slowly stir in the broth and milk. Stir well so there are no lumps. Simmer over a medium-low heat until thick (3-5min). Add the shredded chicken, peas and carrots.

Place the chicken mixture into the casserole dish. Cover with the pastry and cut away the excess. Tuck the edges under and seal with a fork, or pinch the pastry into ridges. Make slits in the top. Bake 20 min until the pastry is golden and the filling is bubbling. Cool for 10min.

Here is a picture of the filling....it's not the best picture, but it gives an idea of what the filling is like!


Tuesday, 21 December 2010

Christmas Peppermint Bark


Finally it is that time of year again! I love Christmas and all the homemade goodies that it warrants making! One of my favourite things to make at this time of year is peppermint bark. To me, peppermint bark tastes like Christmas-minty chocolate and candy cane crunch! It makes a great gift, too and can be wrapped up beautifully. My recipe says that peppermint bark will keep for 2weeks in the fridge. Usually, I don't have it around for that long...but this year I decided to make it a week before I would need it. Well.....a week later it is still ok...but not as great. It's flavour is definitely subdued and I have decided to make a new batch to give as presents. Whilst this makes my family quite happy (they get to eat the rest of the first batch), it is pretty annoying to have to make a whole new batch! So, my advice is, make this a maximum of 3-4 days before you need it.

Here is my perfected recipe....


Peppermint Bark
(makes enough to cover 1 baking sheet)

500g good quality white chocolate
300g crushed candy canes
400g good quality bittersweet chocolate
4tsp vegetable oil
1 1/2 tsp peppermint extract

Cover a large baking sheet with foil.

Stir bittersweet chocolate in a saucepan on medium-low heat until melted. Add peppermint extract and 2tsp vegetable oil. Cool to lukewarm (about 5 mins). Pour onto foil and spread evenly using a spatula or some kind of flat kitchen tool. Refrigerate until cold-at least 25min. Score the chocolate with a fork halfway through the chilling time. Remove any excess bits of dark chocolate.

Stir white chocolate in a metal bowl over a saucepan of simmmering water (do NOT let the water touch the bottom of the bowl) until melted. Add 2 tsp vegetable oil. Remove from heat and cool to 110*F (if you don't have a candy thermometer, this takes about 10mins or so-just make sure it's not very hot anymore but still liquidy. it needs to be only a little bit warm). Pour the white chocolate over the bittersweet chocolate and tip the balking sheet so that the white choc covers all of the dark choc. Don't use anything to spread it as it will mix up the chocolates. Sprinkle with the candy cane bits and press these lightly into the white choc. Chill to just firm-about 20mins.

Lift foil and chocolate onto counter or chopping board. Cut into 2inch strips. Cut each strip into 3 or 4 rectangles. Cut each rectangle into 2 triangles. (obviously you can make them whatever shape you want!)

Chocolate must be kept in the refrigerator!


I like to wrap peppermint bark up in Christmassy cellophane, tied close with red and green ribbons.

Sunday, 28 November 2010

November Daring Bakers Challenge: Crostata!

The 2010 November Daring Bakers' challenge was hosted by Simona of briciole. She chose to challenge the Daring Bakers' to make pasta frolla for a crostata. She used her own experience as a source, as well as information from Pellegrino Artusi's Science in the Kitchen and the Art of Eating Well.

I have to say, I was not very excited about this challenge. I love making pies -but I tend to stick to my very reliable pastry recipe and prefer not to experiment with new ones. I also felt that I wanted something more exciting than a tart. After completing the challenge, I have to say that I am SO glad that I did it. The pasta frolla was AMAZING and is now a permanent addition to my recipe collection. This recipe for it turned out great-it seemed a perfect consistency-no sogginess or crunchiness. I chose to use a Martha Stewart apple tart filling which was also very good. This combination resulted in a wonderful dessert that was perfect for a cold November evening.


Apple Crostata with Pasta Frolla

Ingredients:

For the Pasta Frolla

1/2 c. minus 1 Tbsp caster sugar
1 3/4 c. all purpose flour
1/4 tsp salt
1 stick (4oz.) cold unsalted butter, cut into small pieces
1 large egg and 1 large egg yolk, slightly beaten

For the Apple Filling:

4 apples (such as Braeburn), peeled, cored and sliced into 1/2-in. thick wedges
1/2 c. minus 1 1/2 Tbsp sugar
2 Tbsp all purpose flour
2 Tbsp lemon juice
1/2 tsp ground cinnamon
Optional: 1/4 c. preserves, warmed

To make the pasta frolla:

Whisk together sugar, flour and salt in a bowl.
Rub or cut the butter into the flour until the mixture resembles coarse crumbs.
Make a well in the centre of the mounded flour and butter mixture and pour the beaten eggs into it (reserving about a tsp for glazing later-place in the refrigerator, covered until ready to use).
Use a fork to incorporate the liquid into the solid ingredients and then use your fingertips.
Knead lightly just until the dough comes together in a ball.
Shape into a flat disk and wrap in plastic wrap. Place in the refrigerator and chill at least 2 hrs. You can refrigerate the dough overnight.

To make the apple filling:

Toss together the apples, sugar, flour, lemon juice and cinnamon.

Assemble and bake the crostata:

Heat the oven to 375*F (190*C).
Take the pasta frolla out of the fridge, unwrap it.
Lightly dust teh top of the dough and your work surface with flour. Keep some flour handy to dust the dough as you go along.
If the dough is very firm, start by pressing it with the rolling pin from the middle to each end, moving the rolling pin by a pin's width each time. Turn the dough 180 degrees and repeat. When it softens, start rolling.
Roll the dough into a circle about 1/8th in. thick and transfer to tart pan.
Trim excess dough. Press the dough around the border into the sides of the pan, making sure there is an even thickness all the way around. Optional: leave an inch of dough to fold over the filling.
Prick the bottom of the dough with a fork in several places.
Add the apple filling.
Brush the border of the dough with the reserved beaten eggs.
Put the tart in the oven and bake 25-35min.
After 25min, check the tart and continue baking until it is golden.
When done, remove from oven and let cool. Make sure the tart is completely cool before slicing and serving.


Monday, 1 November 2010

Daring Baker's October Doughnut Challenge

The October 2010 Daring Bakers challenge was hosted by Lori of Butter Me Up. Lori chose to challenge DBers to make doughnuts. She used several sources for her recipes including Alton Brown, Nancy Silverton, Kate Neumann and Epicurious.

This was the first Daring Baker's challenge I have participated in. It was great-I would never have tried making doughnuts....deep frying kinda scares me. So, I am really glad that this challenge came up and that I faced my fear of scalding hot oil!

I decided to make the traditional yeast doughnuts which was an Alton Brown recipe. They were soooo yummy! I made a few alterations to the original recipe after reading a few reviews and I think these changes were great. You can see the original recipe by clicking the link below. They really do need to be eaten within a couple hours as they loose their crispiness pretty quickly!

Yeast Doughnuts

Recipe from Alton Brown (Food Network)

Prep time:
Hands on prep time: 25min
Rising time: 1.5hrs
Cooking time: 12min

Yield: 20-25 doughnuts, depending on size.

Ingredients

1.5 cup milk
1/3 cup vegetable shortening
2 pkgs (4.5tsp) Active Dry Yeast
1/3 cup warm water
2 large eggs, beaten
1/3 cup granulated sugar
1.5 tsp salt
1 tsp cinnamon
23oz plain flour
Vegetable oil- enough to fill your frying saucepan/dutch oven 3in deep.

Directions:

Place milk in a medium saucepan and heat over medium heat, just until warm enough to melt shortening. Place shortening in a bowl and pour warmed milk over. Set aside.

In a small bowl, sprinkle the yeast over the warm water and let dissolve for 5 min. It should get foamy. After 5 min, pour the yeast mixture into a large bowl of an electric mixer and add milk and shortening mixture (ensure the milk mixture has cooled to lukewarm).

Add the eggs, sugar, salt, cinnamon and half the flour. Using the paddle attachment of your mixer, combine the ingredients on low speed until the flour is incorporated. Increase speed to medium and beat until well combined. Add remaining flour on low speed and then increase to medium speed and beat well.

Change to the dough hook attachment of the mixer and beat on medium speed until the dough pulls away from the bowl and becomes smooth (3-4min). The dough will be wet- do not add more flour.

Transfer to a well-oiled bowl, cover and let rise for 1 hr until doubled in size.

On a well-floured surface, roll out the dough to 3/8in thick. Cut out dough using a 2.5 in round cutter and a 7/8-in. ring for the center hole (I used an apple corer).


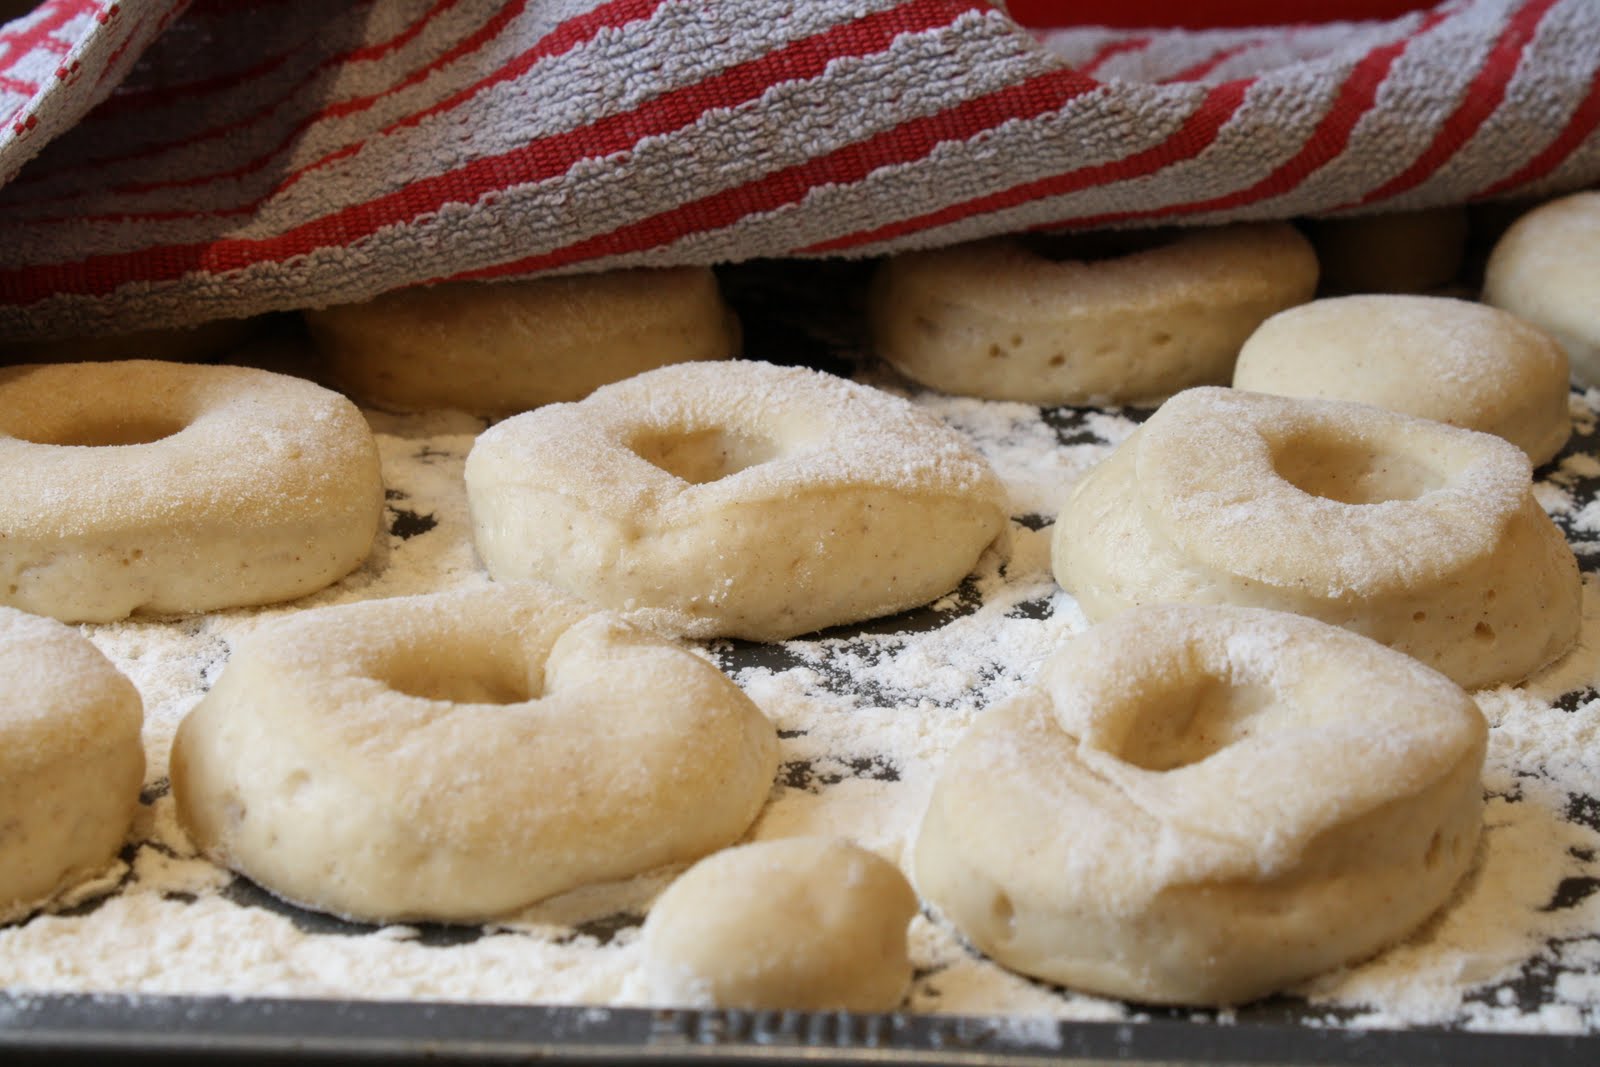
Set on a floured baking sheet and cover lightly with a tea towel. Let rise for 30min.


Preheat the oil in a deep fryer or Dutch oven to 365*F/185*C. Gently place the doughnuts into the oil, 3 to 4 at a time. Cook for about 45 seconds per side until golden brown. Transfer to paper towels on a cooling rack. Allow to cool for 15-20min prior to glazing, if desired.


Chocolate Doughnut Glaze
Makes enough to glaxe 20-25 doughnuts.
Ingredients
1/2 cup butter
1/4 cup whole milk
1 Tbsp light corn syrup/golden syrup
2 tsp vanilla extract
4 ounces of bittersweet chocolate, chopped.
2 cups confectioners' sugar, sifted.
Directions
Combine butter, milk, corn syrup and vanilla in a medium saucepan over medium heat until butter is melted. Decrease heat to low, add chocolate, and whisk until melted.
Turn off heat, add the powdered sugar, and whisk until smooth. Place the mixture over a bowl of warm water and dip the doughnuts immediately. Allow the glaze to set for 30min before serving.


These dougnuts were really, really good. The cinnamon gave them a slightly deeper flavour and they were not too sweet. The glaze provided the perfect amount of sweetness and tasted amazing! These doughnuts were actually dangerous for me to have around- I ate way too many.


And since I made them on Halloween, I decided to decorate a couple with candy corn....


Overall, a really fun challenge and a highly recommended recipe!!